
Setting up the Infrared Laser Rifle Range
To set up the laser rifles, you’ll need a section of the gym about 40 feet long and 20 feet wide. The best location is a corner area because it naturally restricts the foot traffic around the shooting area. Place the rifles on the ‘firing line’ so that they face a wall and won’t have anyone trying to run through the line of fire.
Proper setup is VERY IMPORTANT because this helps reinforce safe behavior and protects the laser rifles.
- AN ADULT MUST BE PRESENT TO OVERSEE ALL LASER RIFLE SESSIONS, from set-up to take-down. DO NOT leave students unsupervised with the laser rifles because this leads to unnecessary horseplay.
- Clearly define the shooting area and firing line with cones or other markers. To keep basketballs and other items away from the shooters, guns, and targets. It’s ideal to use half the gym for shooting and shooting-related activities.
- Make sure that everyone in the gym understands where the shooting area is and what is expected of them so that nobody chases balls or other wayward items into the firing area.
- The rifles should be placed 20-30 feet from the targets to ensure optimal operation. Too close and the site picture will be off. Too far away and the system won’t operate properly.
- Always place the target boxes near a wall so that there is a natural ‘backdrop’ for shooting and to reduce the chance of someone running ‘around’ the shooting area. It is best if the target backdrop is white or another light color. This makes it easier for shooters to see the targets while aiming.
- Place target boxes securely on the ground for or another stable surface (when shooting standing) so they don’t fall and get broken.
- Place the gun cases on the firing line so they can be used by shooters as a rifle rest.
- Remember, a safe environment that encourages respect for the shooters and equipment is our primary goal!
Storage, Charging, Turning Devices On, and Adjustments
Each infrared laser system comes complete with a heavy duty case to protect the electronics and all the necessary equipment to charge the computer, target boxes, and rifle.
1. Storage: There is a designated space for each component. Return all items to their proper locations after each use and place the case in a locked storage area!
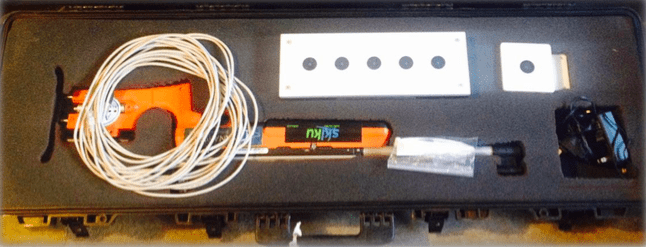
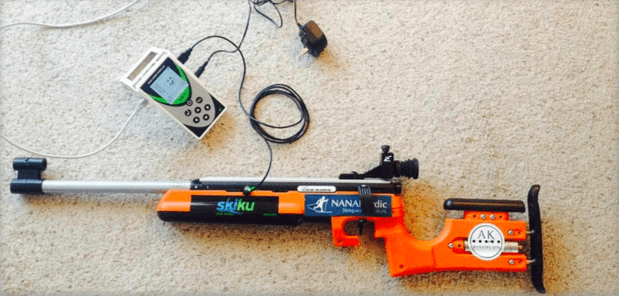
2. Charging & Powering On: The target box, handheld computer, and rifle must be charged in order to function properly. Consult the photos below to see how to connect the various components.
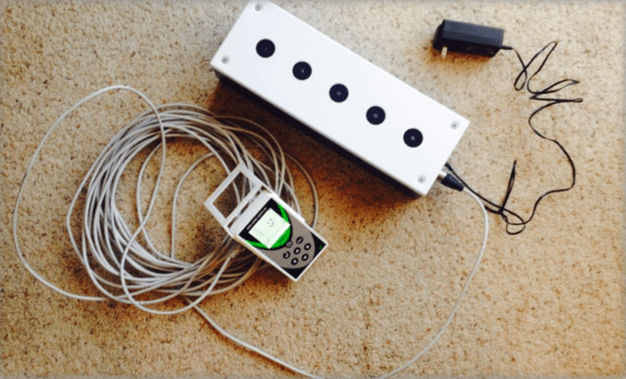
a. Target Box- charged via a black power box. It also connects via long, white cord to handheld computer. Turn on via switch on the side.
b. Handheld Computer- can charged via black power box or by being plugged into target box. You can also charge the rifle using a cord that connects from the handheld computer to the rifle. Turn on via power button, top and center.
c. Rifle- powered via cord from handheld computer or plugged into USB wall socket (not included). Turn on via button on the left side of the rifle.